


TomC
-
Posts
10 -
Joined
-
Last visited
Content Type
Profiles
Forums
Blogs
Events
The MRC writes
Posts posted by TomC
-
-
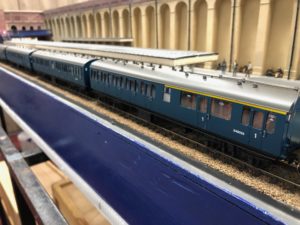
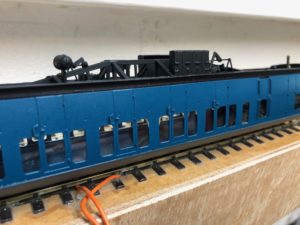
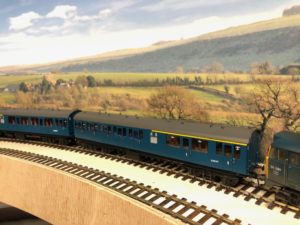
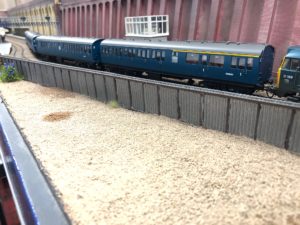
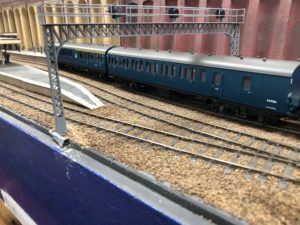
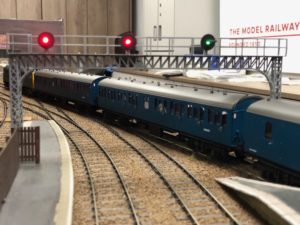
Over Christmas I've managed to bring to a conclusion one of several projects that have been on the go for too long - a second rake of outer suburban coaches for Minories and ultimately for Canonbury.

As a recap - the Great Northern (King's Cross) suburban services in the 1950s-70s were characterised by the 'short' Mark 1 non-gangway coaches - normally hauled by Class 31 diesels. The majority of coaches and trains were formed of compartment third/second class coaches, as manufactured for several years by Bachmann in OO, and these would have formed the bulk of services to and from Minories. That's what you'll see most of the time on Minories as I've made several rakes with some heavy work on the Bachmann shell - repaint, new windows etc.
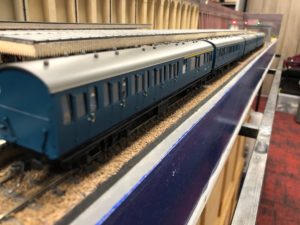
The outer suburban services were operated with Composite Lavatory 'CL' and Second Lavatory Open 'SLO' coaches - with very different and obvious window layouts - and I wanted a set to give a little variety to the coaching stock even though they didn't normally serve the widened lines.
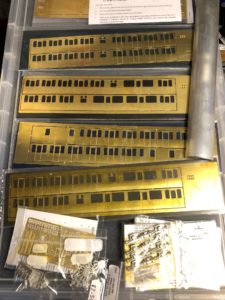
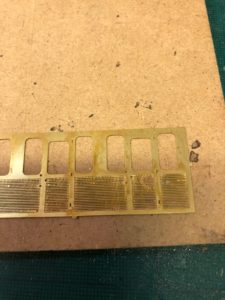
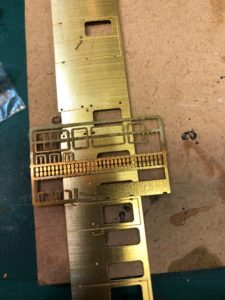
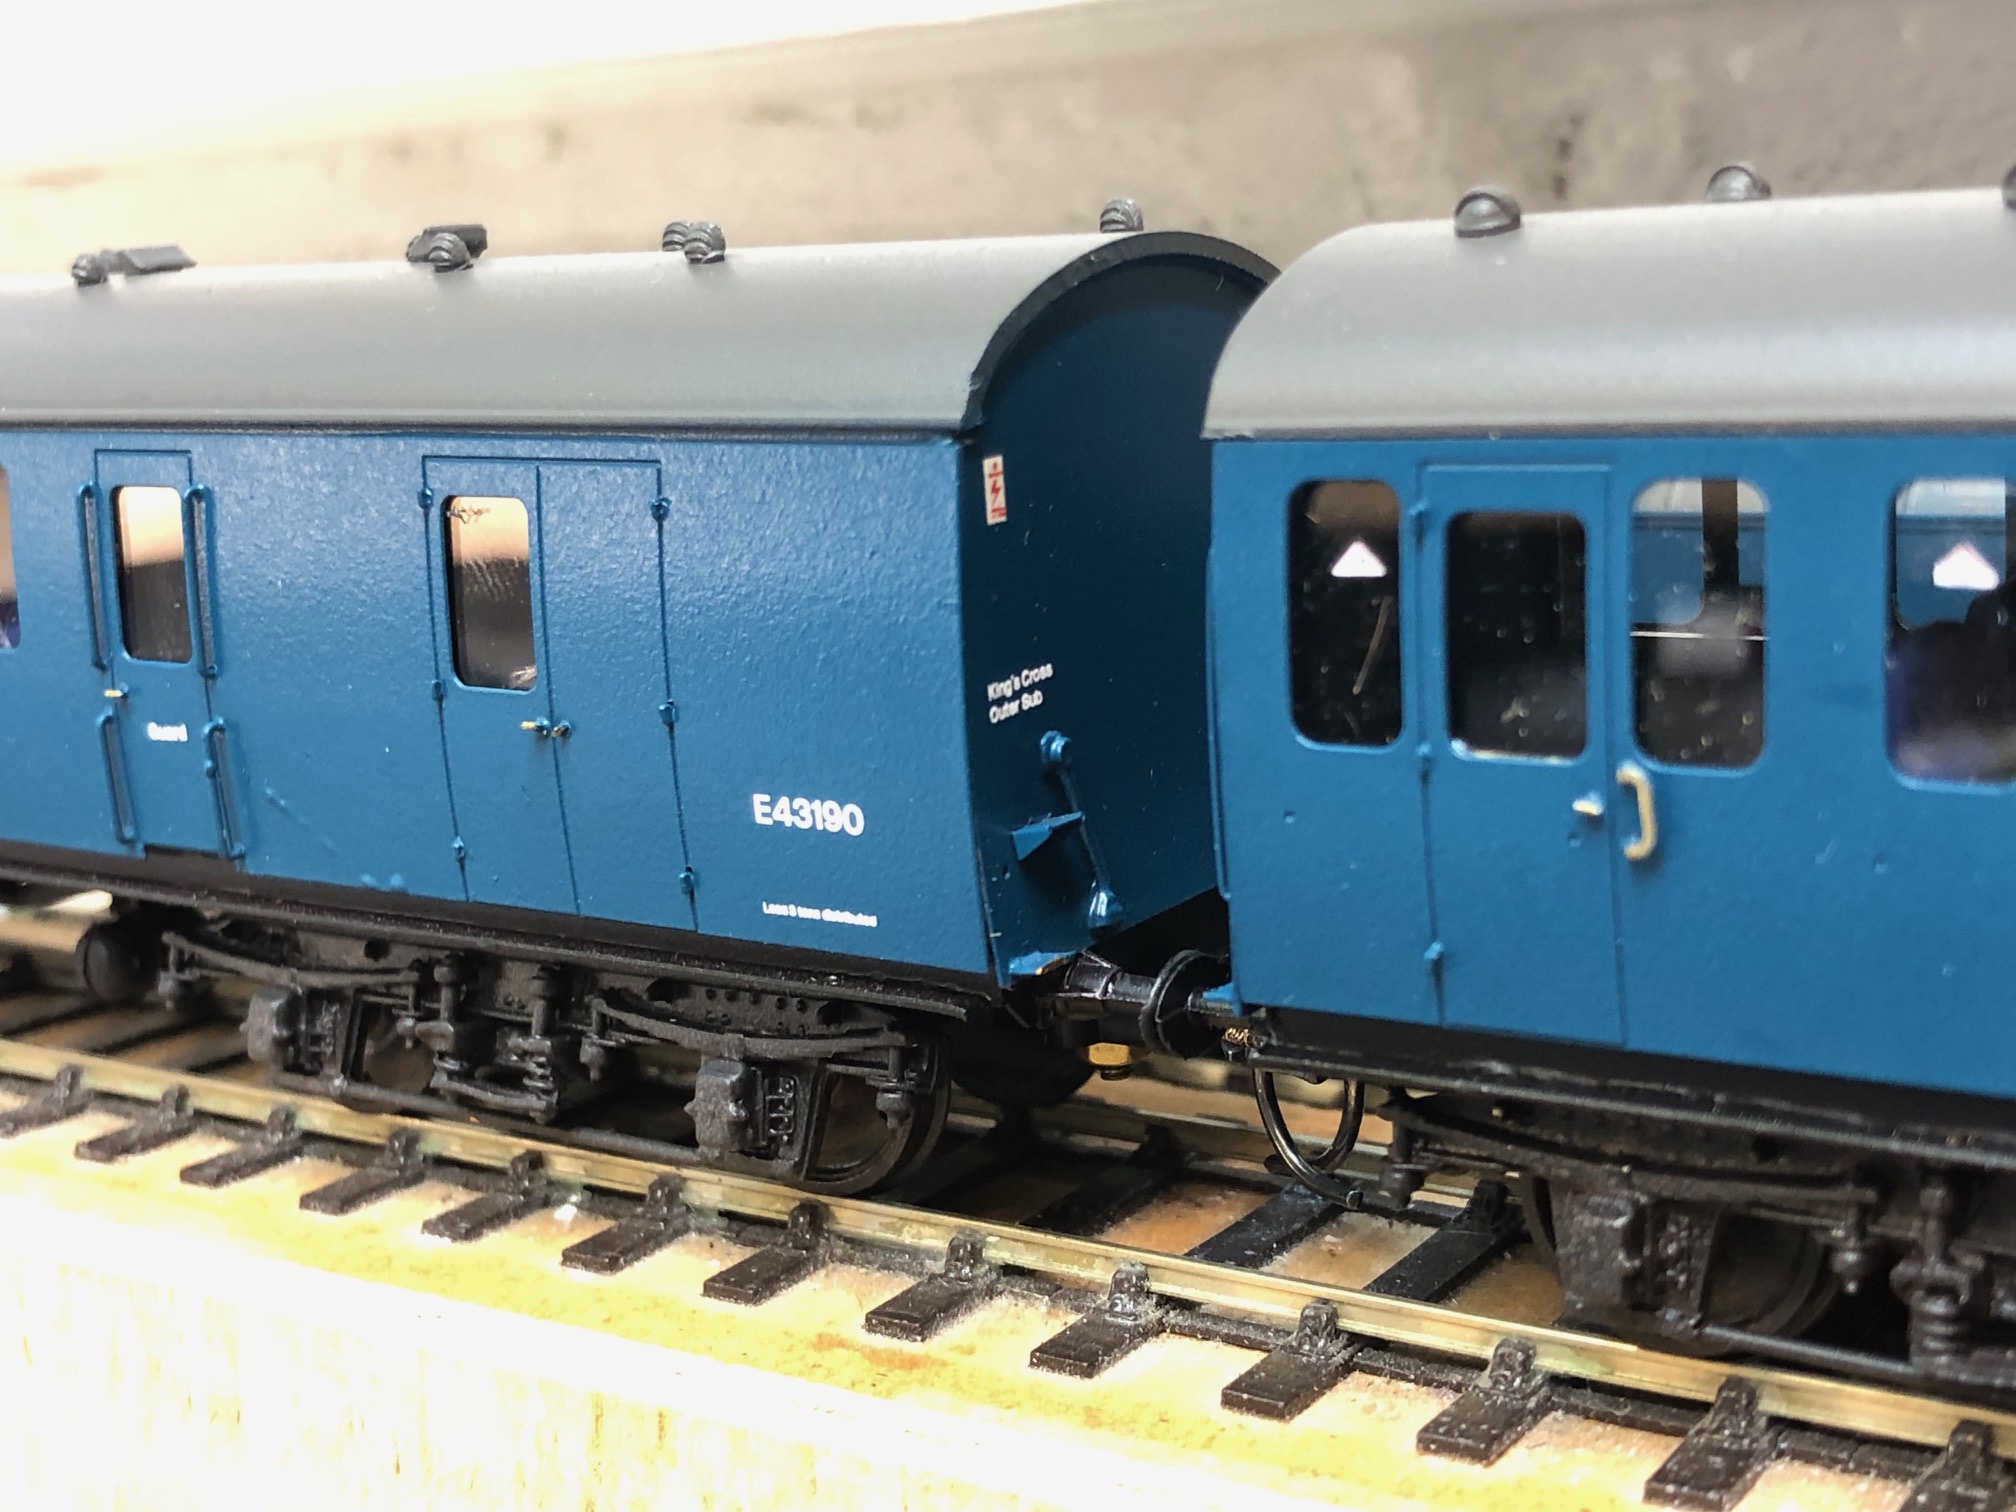
Although these are about to be produced in 4mm scale RTR by Accurascale, until then the only option for the CL has been to build them from etched brass components supplied by Bill Bedford (the etched sides) and Comet Coaches (the rest). The SLO had been available as a plastic kit from DC kits, but following the withdrawal of that range the only option was brass. This post shows how I went about building a four coach rake for Minories, including a Brake Second coach to ensure the rake looked the same.
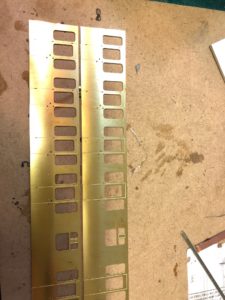
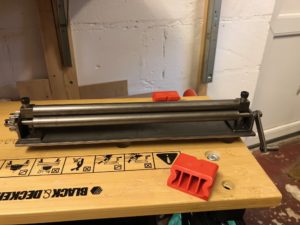
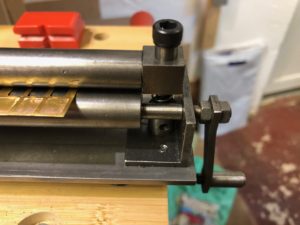
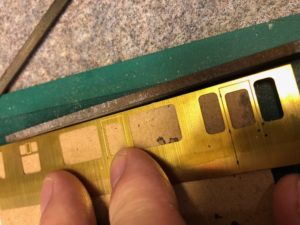
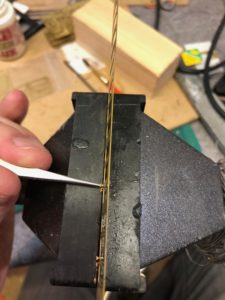
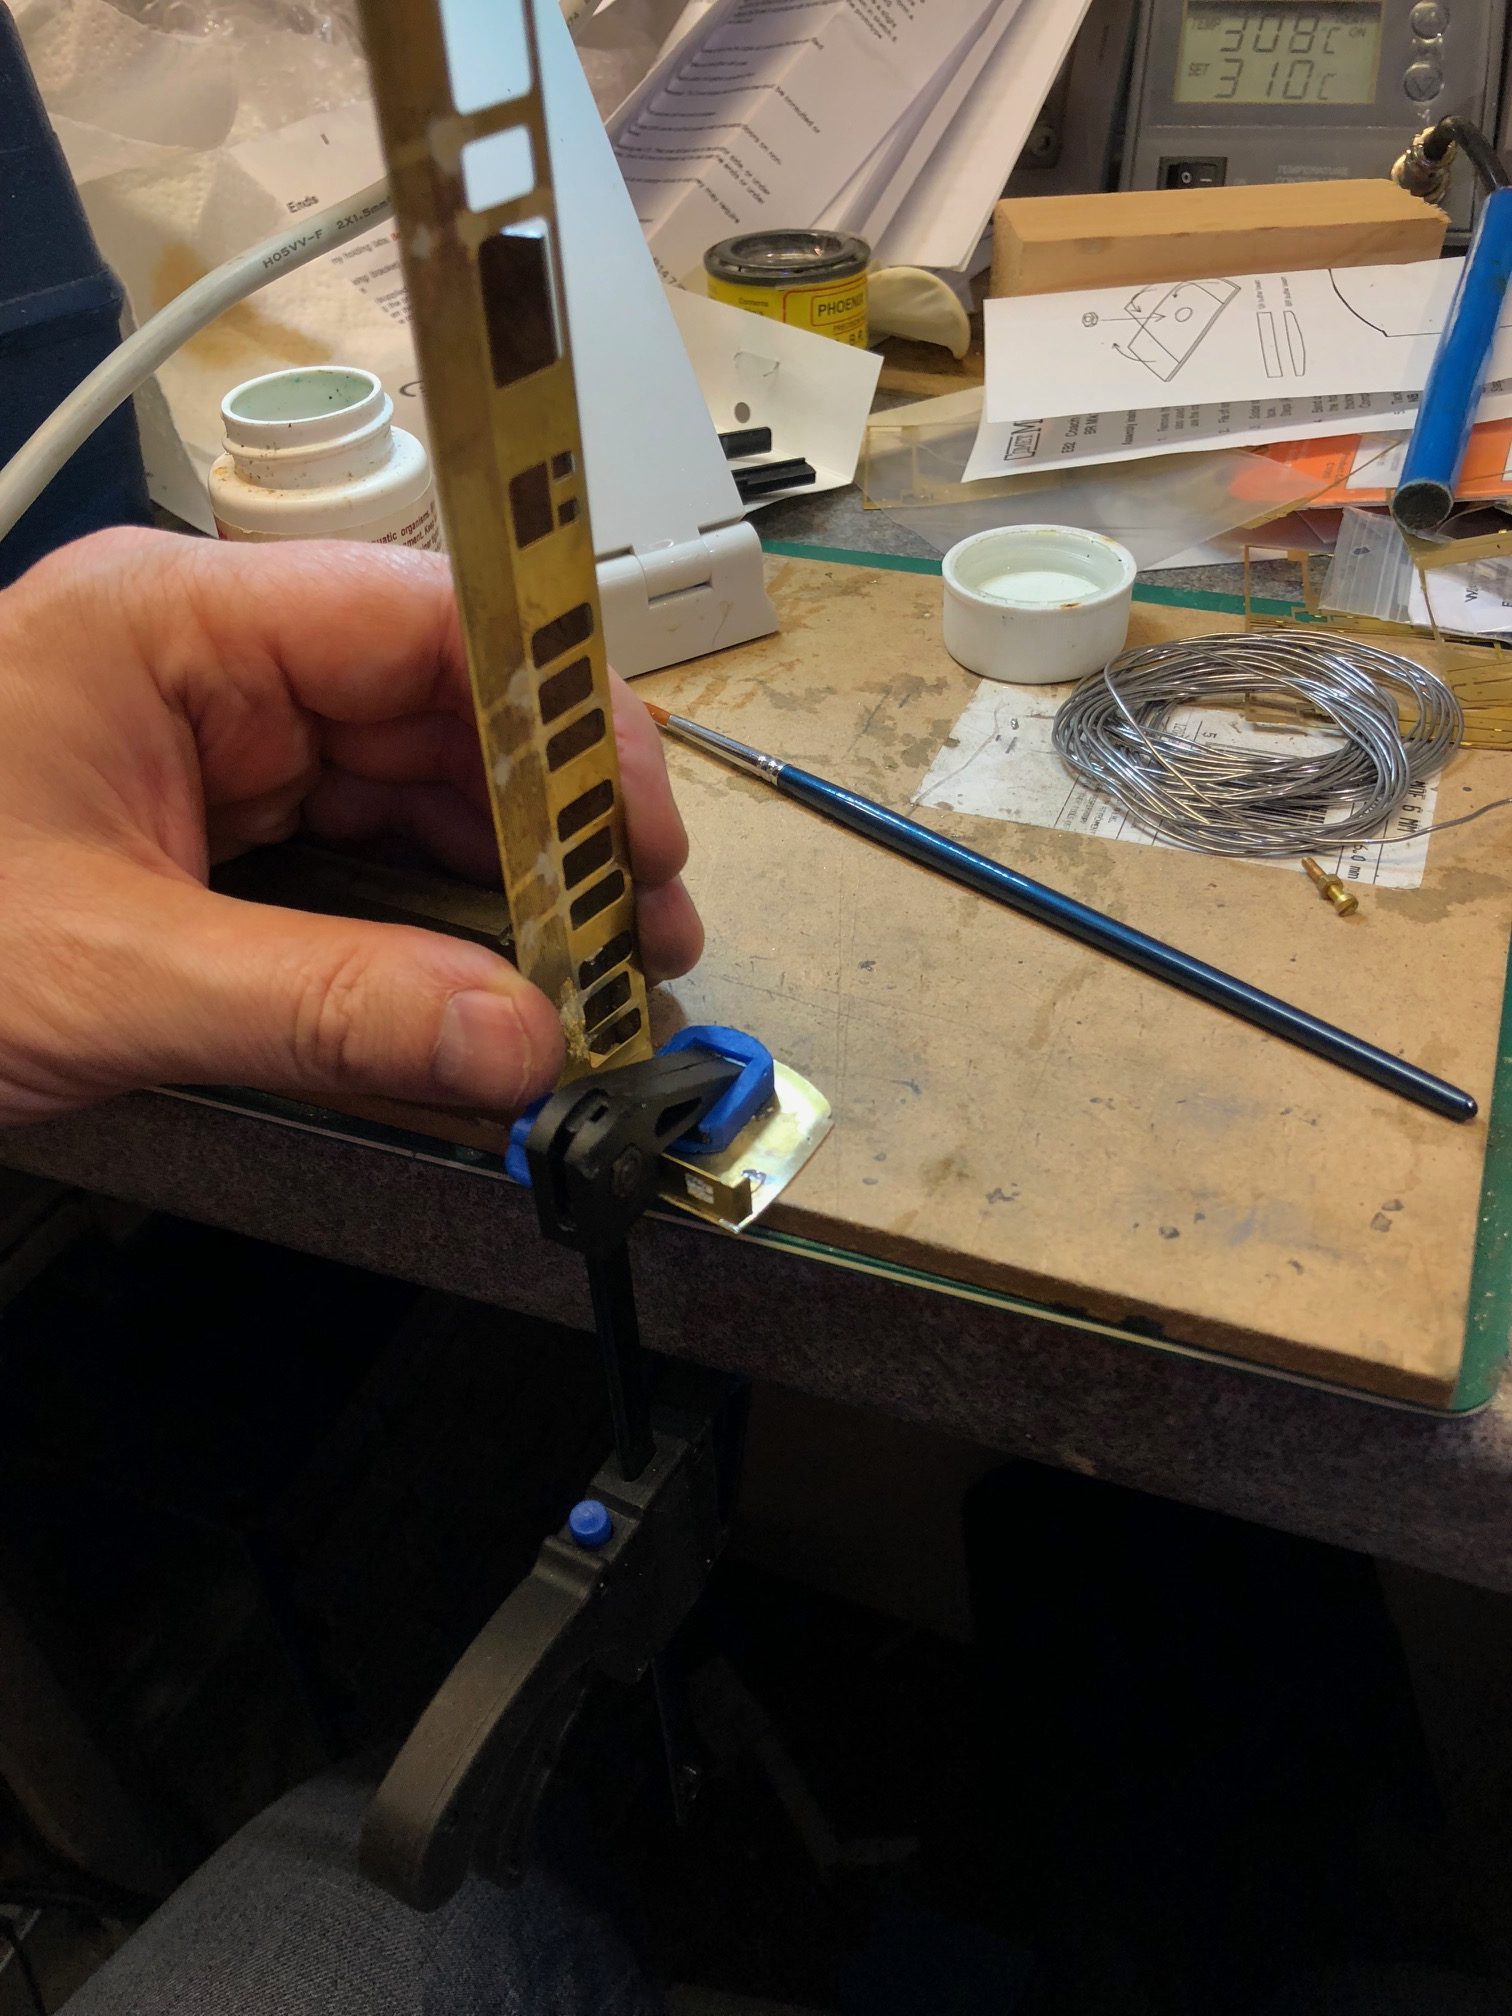
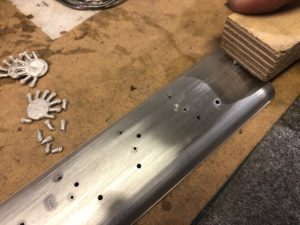
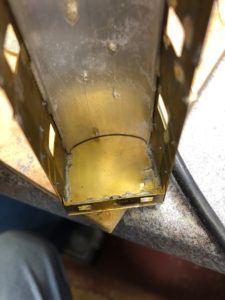
The sides come flat, so the first job is to add the curvature. This can be achieved in a couple of ways, but I've invested in a GW Models rolling mill that enables the coach sides to be gradually rolled back and forth to give the right amount of curve
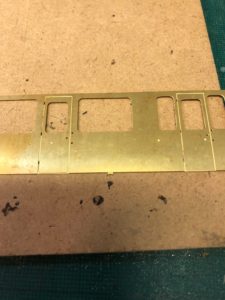
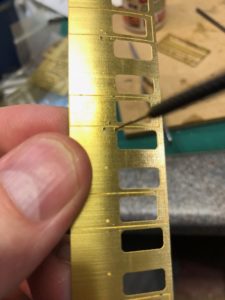
Once the curve is right (judged by using the coach ends to check), I drilled out the holes for the door furniture, and cleaned off any remaining tabs on the top and bottom.
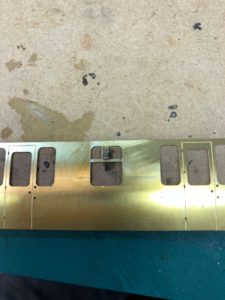
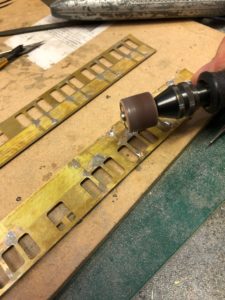
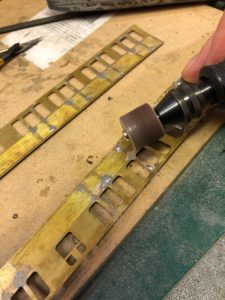
Next up is soldering in place the hinges, handles and knobs. I clamped the sides vertically and used tweezers to hold the components in place whilst soldering. Then when that was done, I ground off the solder inside the coach so that the glazing could sit flush
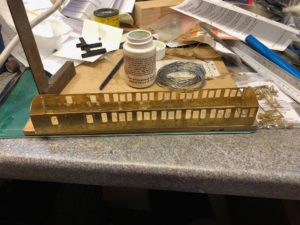
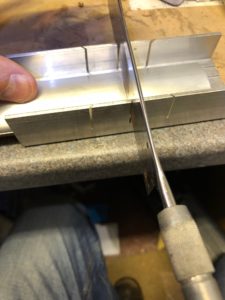
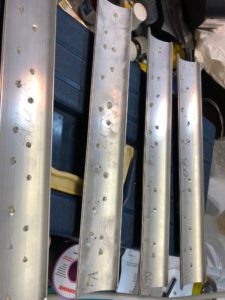
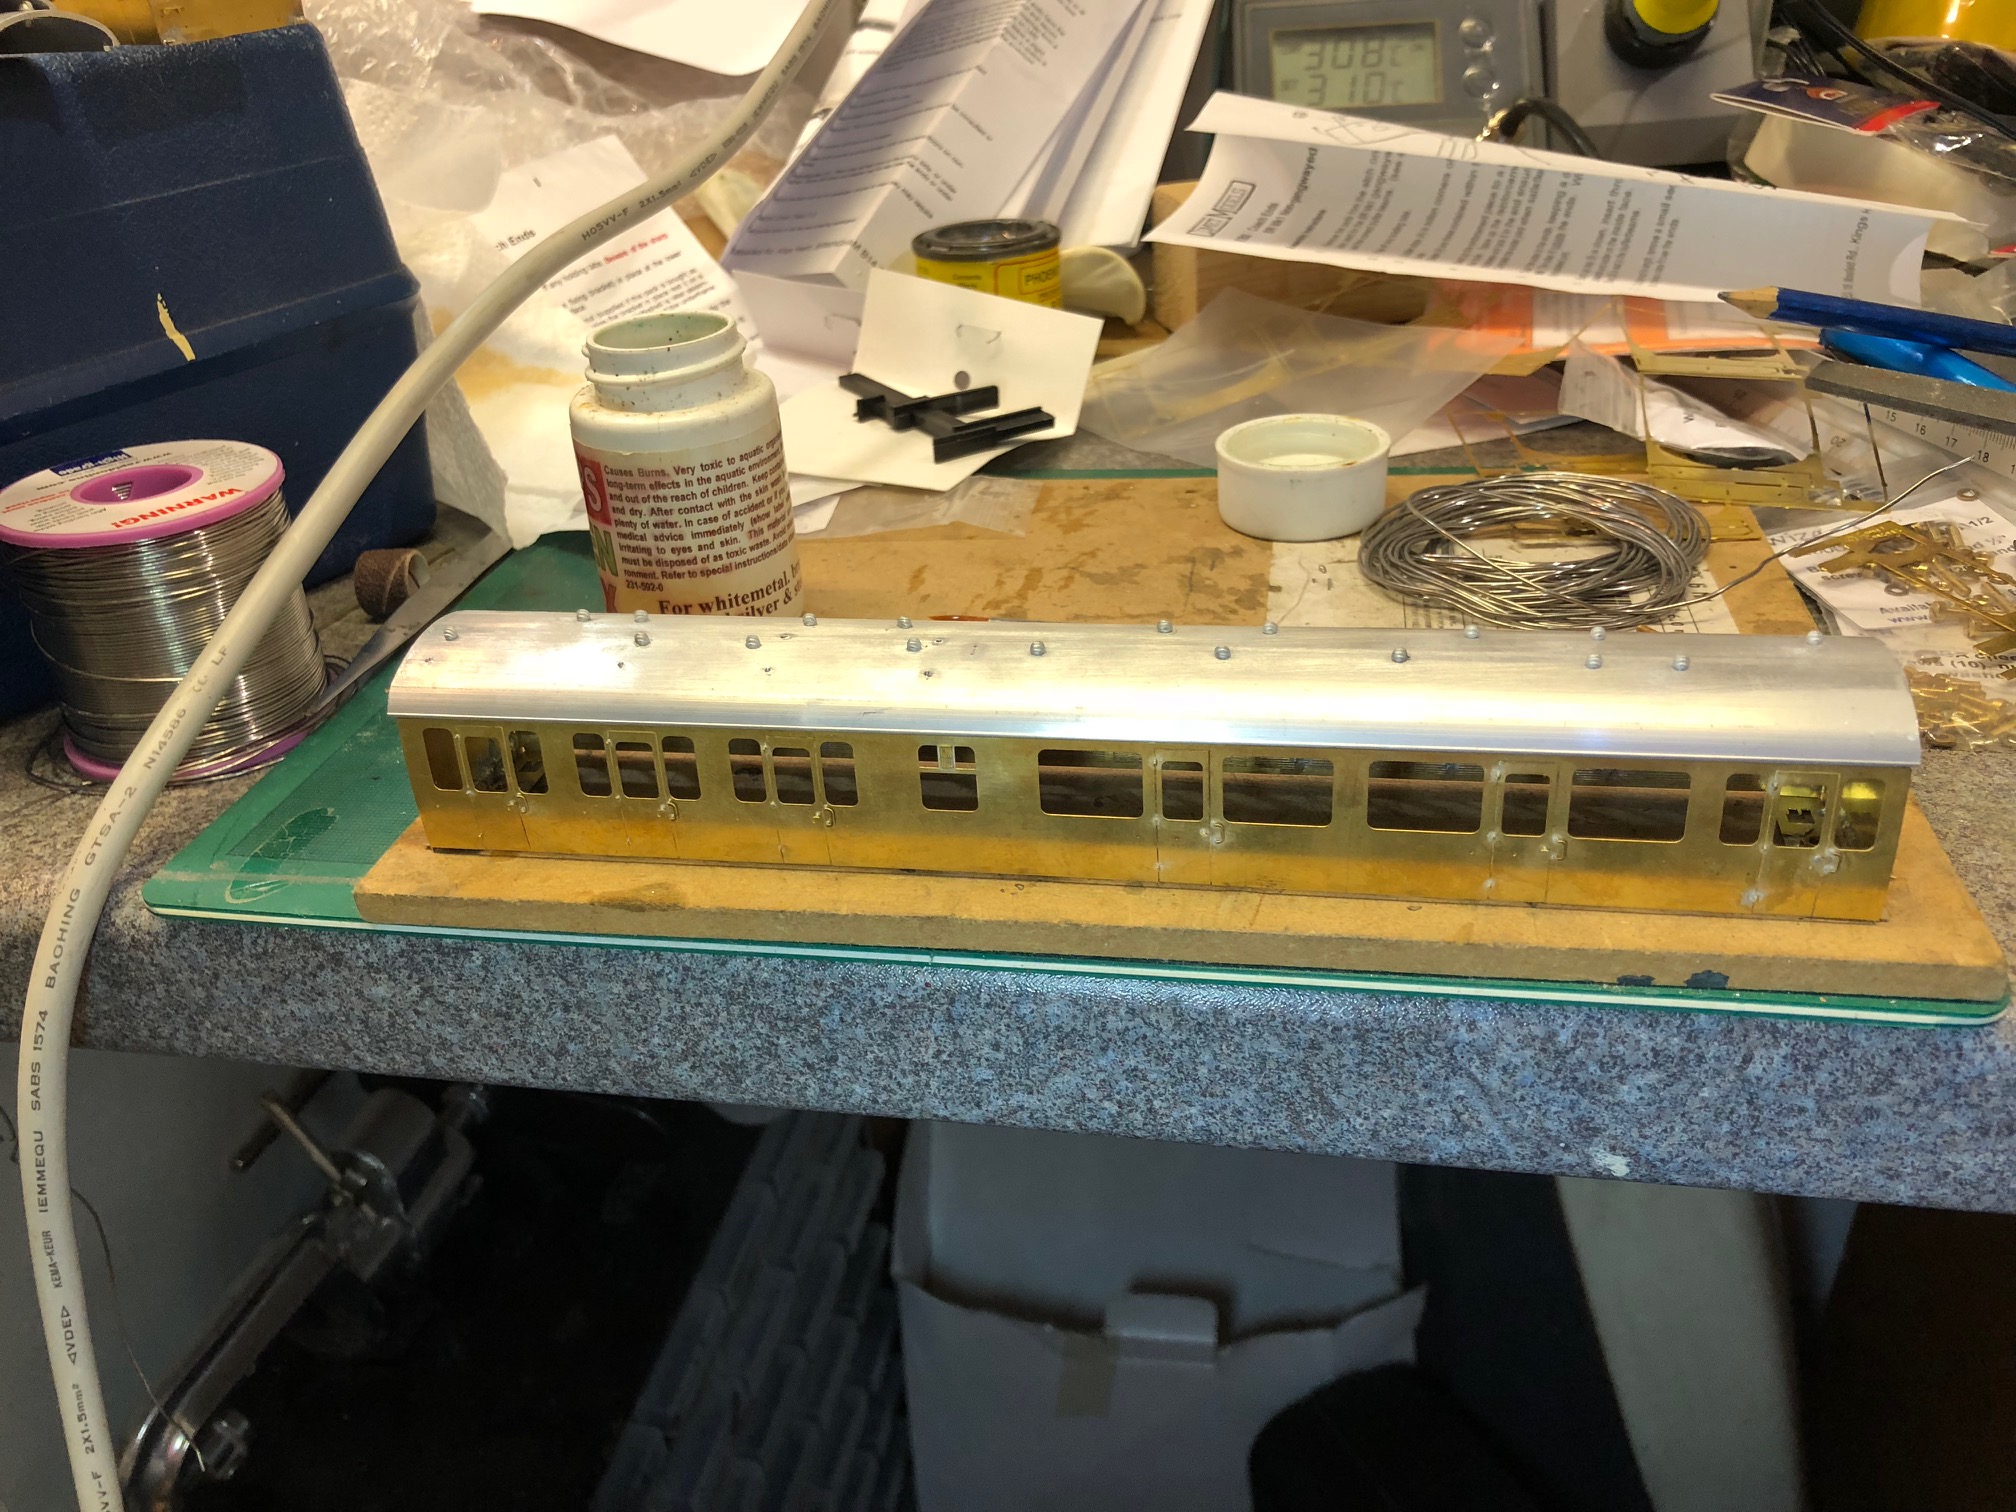
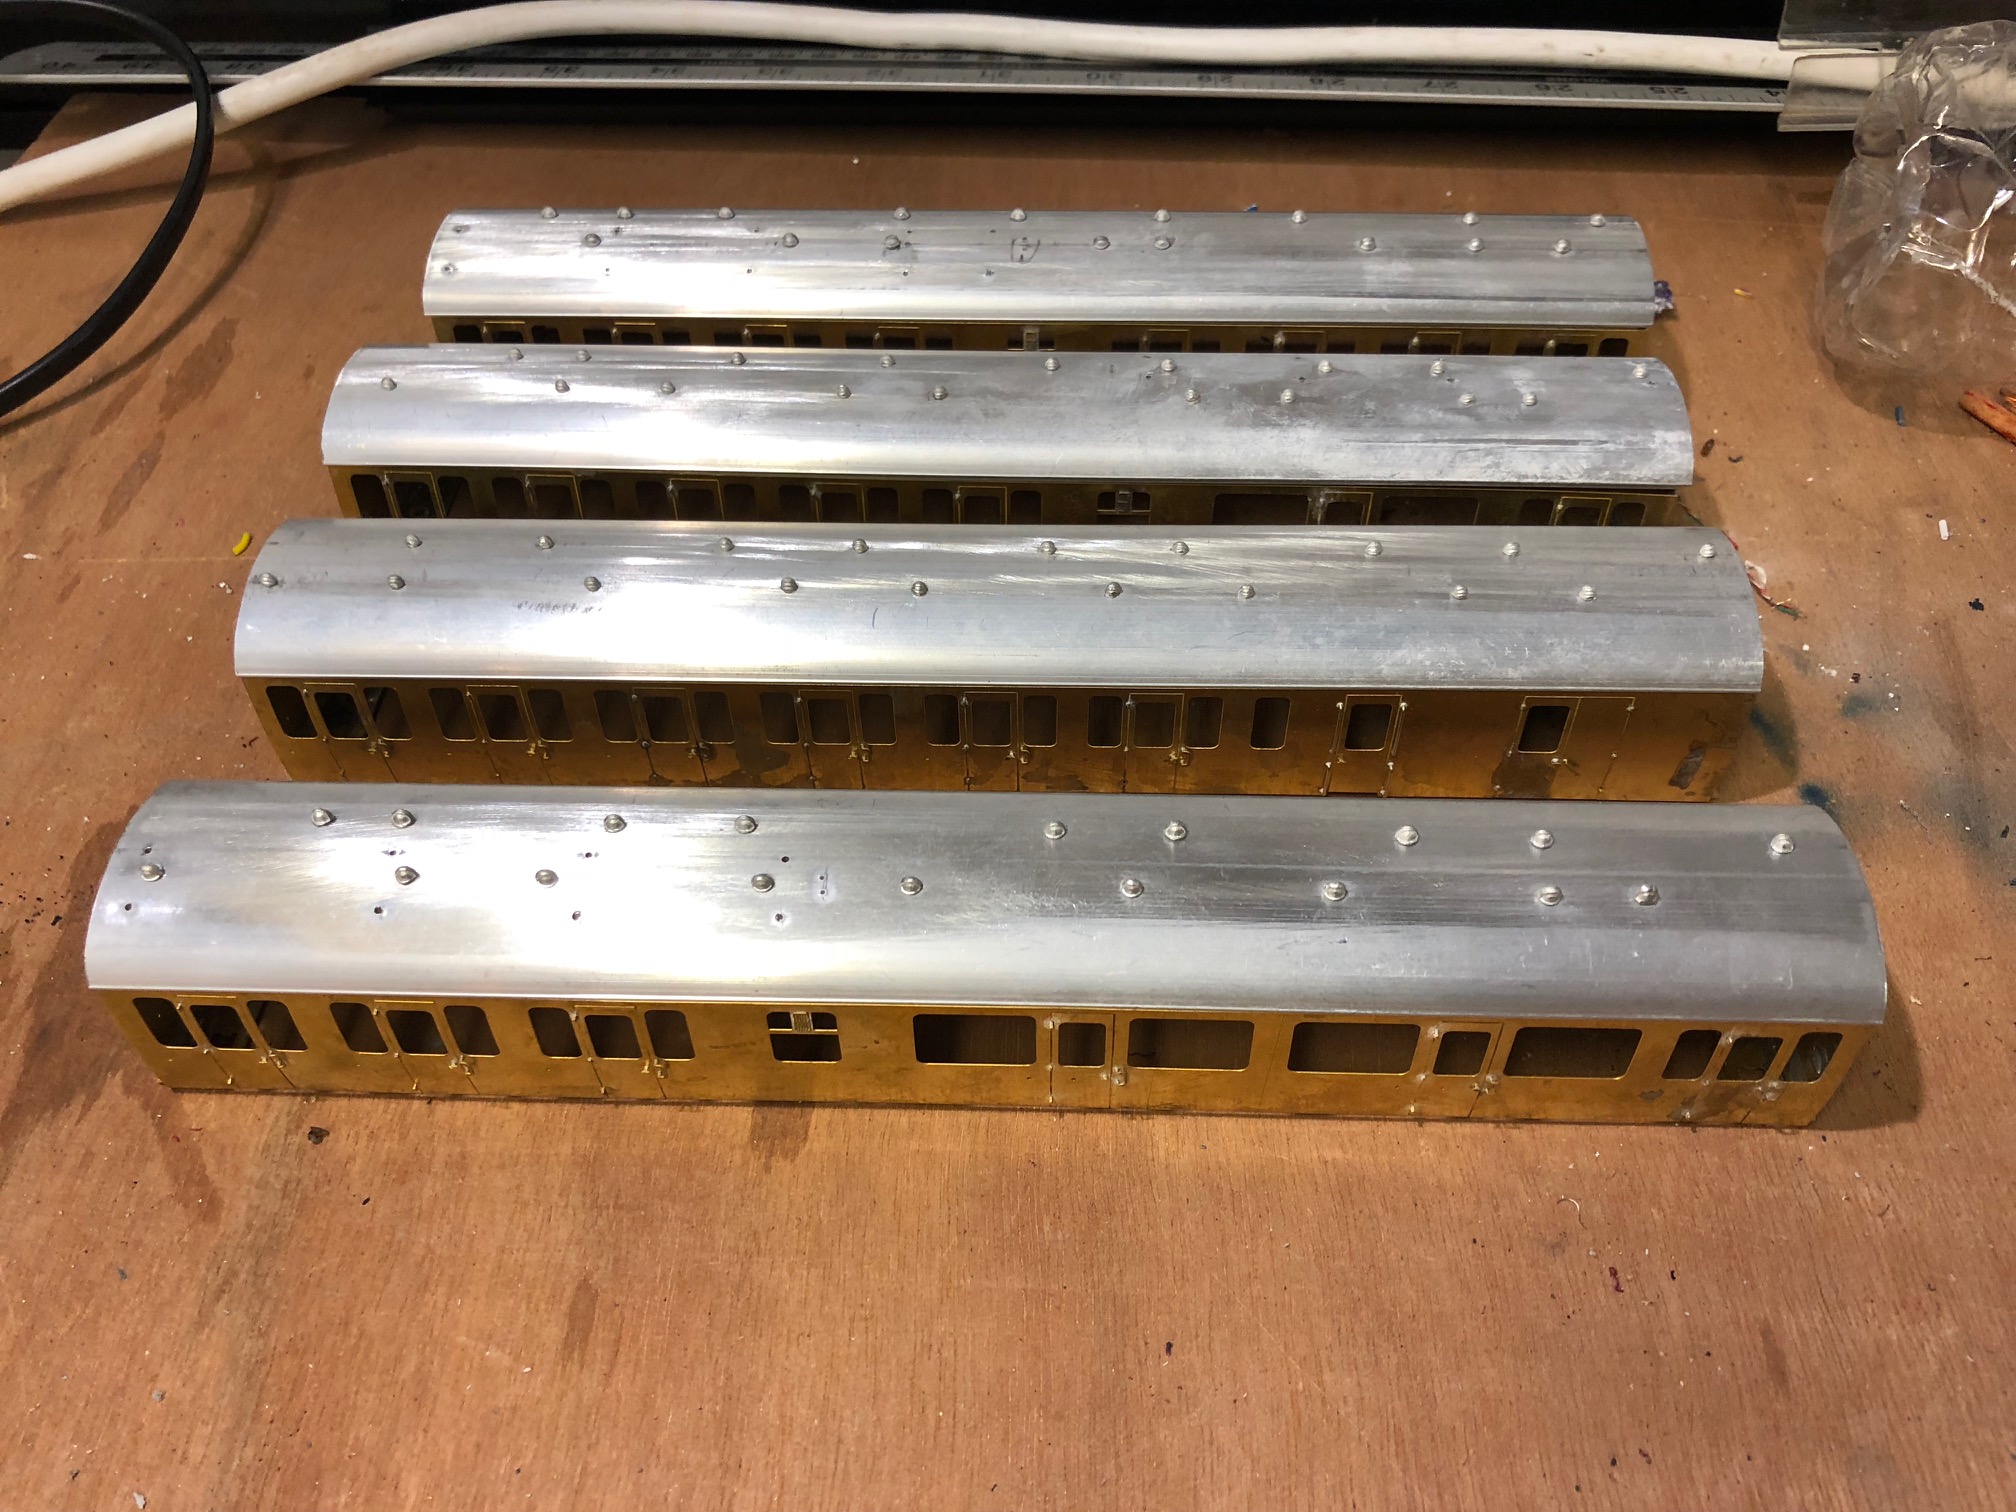
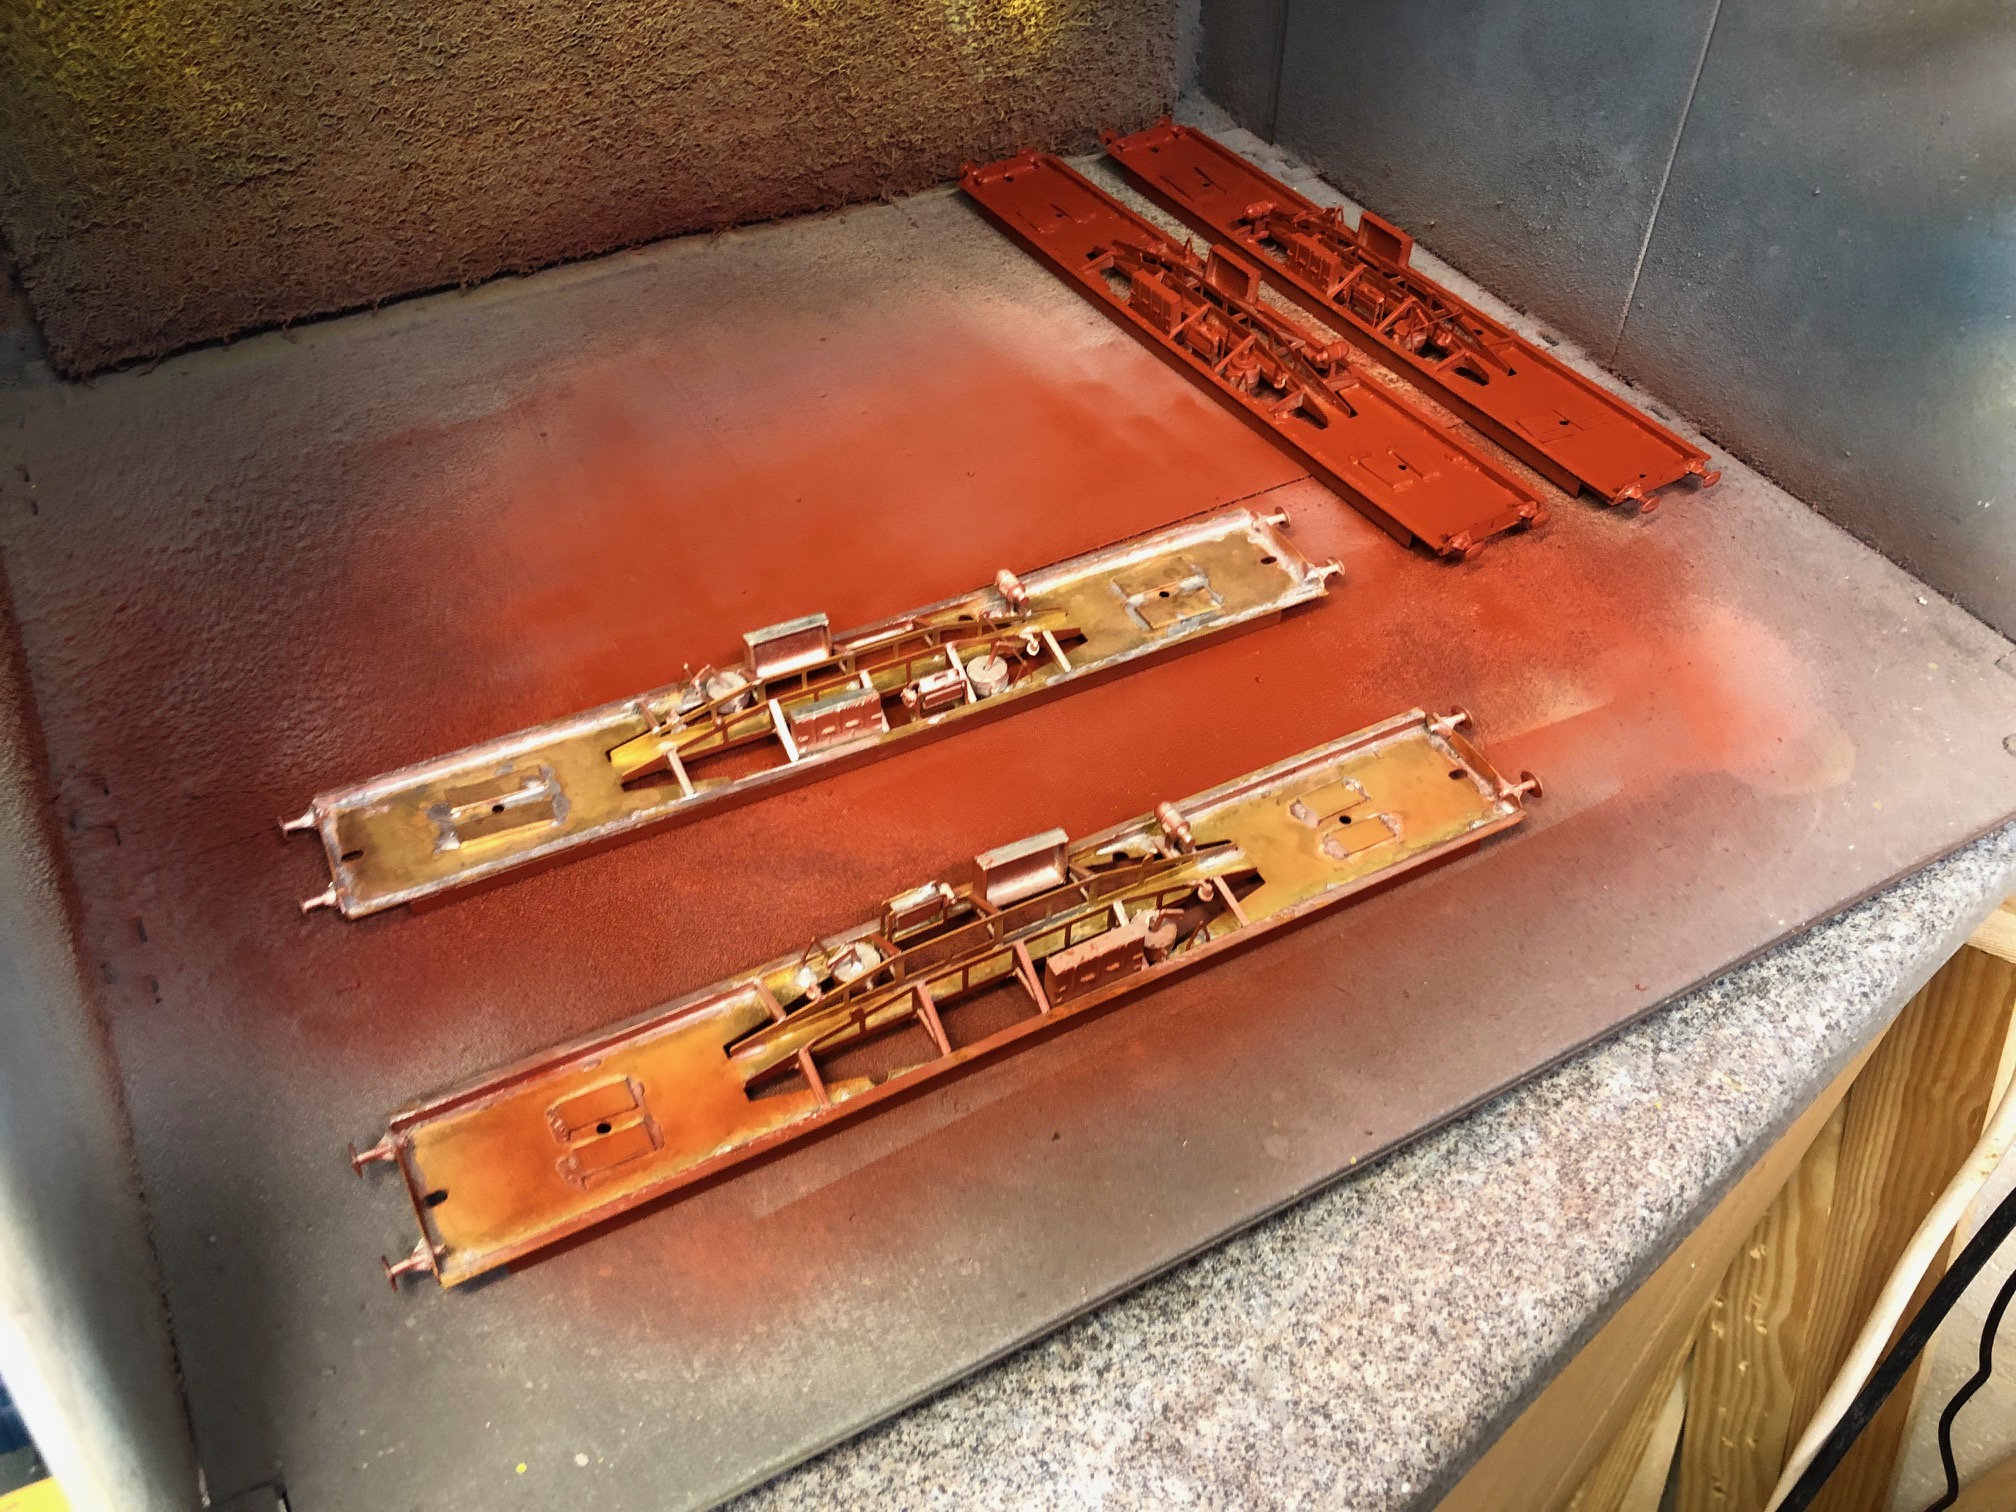
Once satisfied, I followed the Comet instructions in making up the structure of the ends, and then soldering the sides to the ends. The only difference is that I do the reverse for the body / chassis mounting and have the bolt mounted inside the body, so it can be used to anchor the Kadee coupling.
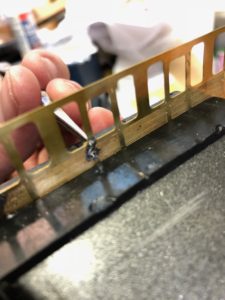
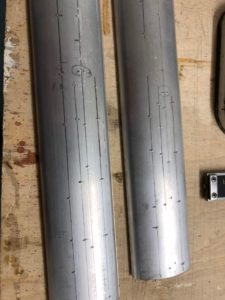
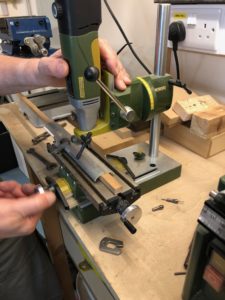
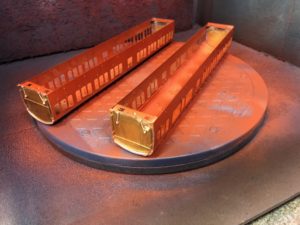
Roofs come next, cut to length and marked out for the vents and water fillers. The fillers are made of wire with Alan Gibson handrail mounts. I made use of the Club pillar drill to drill to drill the holes out, then glued the components in place.
and then the roofs glued to the bodies with epoxy
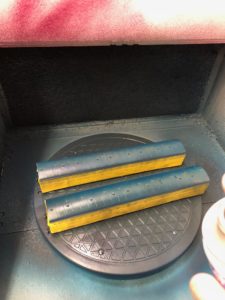
Once satisfied all was straight, and they were running freely being propelled around a test track, I cleaned the bodies and chassis with Cif and a toothbrush before priming them with Halfords spray primer, followed by the BR blue and finally (with masking) the roofs.
Into the final straight once the paint had fully dried I fitted glazing inside using canopy glue.
The interiors are from Replica, cut up to match the layout inside the coaches and painted. The transfers are a mixture of Fox for the no smoking, first class etc, and some bespoke transfers from 4D Model Shop. The latter enables whole 'blocks' of aligned numbers to be applied which is I find simpler than trying to line up individual numbers from a generic sheet on the side, plus it provides the unique end markings. It's fairly expensive to produce a single A4 sheet, but I suspect that in the end it's about the same as buying the variety of other sheets I would need.
After fitting the Kadees, another check on the test track before giving them a run on the layout - where there worked smoothly with just a couple of adjustments to the coupling positions to avoid buffer lock on the tight reverse curves.
They've taken a while to build, but it's been very worthwhile. Whilst it's "the curse" of many a kit and scratch builder to find an RTR product is being produced just as you finish you own project, I don't think that will ever beat the 'I made it' feeling.
-
 1
1
-
 1
1
-
-
LFoRM 2023
in LFoRM
A reminder that the 2023 exhibition is on 18th and 19th March at Alexandra Palace. More details to follow... but club members are asked to keep 16th-19th free to help staff the event.
-
1
-
-
Growing up by the WCML in Camden in the late 70s and 80s, one of the odder looking trains were what I later learnt to be the Manchester and Liverpool Pullmans - with their striking reversed livery of grey with blue window surrounds. There were two 8 coach rakes - full trains - on the Manchester workings, and two four coach rakes that were formed with other standard coaches on the Liverpool Pullman. Each set did a return trip a day to suit business traffic and hauled normally by Class 86 locos - many places suggest they couldn't be hauled by diesels (although apparently though a Class 47 might have been suitable...?) so never really ventured off the WCML. I can only recall seeing the full Manchester set, but it's one of those interesting projects that will probably never be made RTR because of the niche nature of their operation, and you need 3 quite distinct coach types.
Luckily Southern Pride make kits, so here's my attempt at making a Liverpool rake (at least to begin with!) of four coaches.
The kits are a combination of plastic, resin and brass
The resin is nicely moulded, but with a little cleaning up. Next stage is trimming the bottom of the roof over the resin sections, done best with a fresh scalpel blade
Then after tiding up the sides, and gluing in the lower reinforcing ribs, gluing them to the resin ends (although ends in some cases is 1/3 of the coach)
The roof is used to double check it's all square. Whilst the instructions don't say so, I then added Araldite to the insides of the joints as I don't trust superglue
On the first one I glued the roof in place at this stage to ensure it was a solid box, but on the next two I'm trying to put the roof on later.
A little filler needed on the side, as the joints between the brass and resin isn't perfect. Next up some painting - with the inevitable paint / fill / sand and repeat until the body joints are hidden.
Whilst the paint is hardening, bogies are next - they need some opening up to allow EM gauge wheels in, then on with the floor - sides bent up and the resin components glued in place
-
1
-


So, it begins [Bournehampton - 1936, 00 gauge]
in On the workbench
Posted
Look interesting James - what is the basis for this one - does is share stock etc with the current project or something completely different?